Table of Contents
There’s something genuinely satisfying about cooking over charcoal. The smell, the sound, the control you have over every part of the fire. It’s a different experience from turning a knob on a gas grill. But that hands-on nature is also what trips so many people up. Charcoal grilling rewards patience and attention. Get something wrong, and you’re looking at uneven cooking, flare-ups, undercooked chicken, or a brisket that tastes more like lighter fluid than smoke.
Whether you’re new to charcoal or have been at it for years, a few habits can quietly undermine your results every time. We see it often when helping homeowners across Central Indiana troubleshoot charcoal grill performance. People run into the same charcoal-grill problems, cook after cook, without knowing exactly where things are going wrong. So here’s an honest look at the most common charcoal grill mistakes people make, what causes them, and what to do instead.
Not Letting the Coals Ash Over Before Cooking
This is probably the single most common mistake, and it shows up in backyards everywhere. People light the charcoal, wait a few minutes, and then put food on while the coals are still mostly black and actively flaming. The result is uneven, unpredictable heat and food that tastes of raw smoke rather than that clean, deep char you’re actually after.
Charcoal needs time. Lump charcoal and briquettes both need to reach the point where they’re mostly gray-white on the outside with a steady orange glow underneath. That usually takes around 15 minutes after the coals are fully lit, sometimes a bit longer if you’re working with a full load. The fire settles, the temperature stabilizes, and you get cooking conditions you can actually work with.
A chimney starter speeds this up considerably and eliminates the need for lighter fluid entirely. Fill it with charcoal, stuff some newspaper or a paraffin cube underneath, and light it. In about 15 to 20 minutes, you’ll have a full load of properly lit, ash-covered coals ready to pour into the firebox.
Relying on Lighter Fluid
Lighter fluid is everywhere, and plenty of people reach for it out of habit. The problem isn’t that it can’t start a fire. It obviously can. But it adds a petrochemical flavor to your food when it hasn’t fully burned off. If you pour too much, or if food goes on before the fluid has completely combusted, you’ll taste it. That’s especially true with anything delicate like fish or chicken.
The chimney starter method, as mentioned above, does the same job better. No chemicals, no off-flavors, and your charcoal lights more evenly, too. If you want a little extra help getting things going, paraffin fire starters work well and burn clean.
Skipping the Preheat
Even if you light your charcoal properly, the next mistake shows up right after.
Just like an oven, a charcoal grill needs time to reach temperature before anything goes on it. Skipping the preheat leads to food sticking to the grates, inconsistent heat across the cooking surface, and searing that never quite happens.
Once the coals are ready, put the lid on with the vents open, and let the grill heat up for another 10 to 15 minutes. By the time you place your food down, the cooking grate should be hot enough to sear on contact. That’s how you get grill marks and lock in moisture, instead of food that steams awkwardly and sticks.
Ignoring Airflow
The vents on a charcoal grill, both the intake vents at the bottom and the exhaust vents at the top, are your primary tools for temperature control. Most people either forget about them entirely or leave them in a fixed position throughout the whole cook.
Here’s how it actually works: open vents let more oxygen in, which feeds the fire and raises the temperature. Close them down, and you reduce airflow, which brings the heat down and extends burn time. The exhaust vent at the top also draws air through the grill, helping with smoke circulation. Adjusting both together gives you real control over what’s happening inside.
Leaving the vents fully open for the entire cook, especially with a thick cut of meat, often means running hotter than necessary and drying out the food. Closing them too early can smother the fire. Learn to read the heat and adjust both vents incrementally rather than going all the way open or shut.
Not Setting Up Heat Zones
Many people pile all the charcoal in the center and cook everything directly over it. That works fine for thin cuts that need a quick sear, but it’s one of the main reasons why charcoal grills cook unevenly. Thicker cuts, whole chicken, or anything that needs time to cook through will burn on the outside long before the center is done.
Two-zone cooking is one of the more practical techniques in charcoal grilling. The idea is simple: put all or most of the charcoal on one side of the grill and leave the other side empty. The hot side delivers direct heat for searing; the cooler side provides indirect heat for slower, gentler cooking. Understanding the difference between direct and indirect heat is what really separates consistent results from guesswork.
Sear a steak over high heat for a couple of minutes per side, then move it to the indirect side with the lid on to finish cooking to temperature. That way, you get a proper crust without overcooking the center. The same principle applies to bone-in chicken pieces, pork chops, and just about anything else that needs even heat throughout.
Loading Too Much Charcoal
More fuel doesn’t automatically lead to better results. In fact, overloading is one of the charcoal grill problems that’s surprisingly common among people who want to “make sure” the grill stays hot. What it actually does is create fire that’s too intense, which leads to flare-ups, scorched food, and difficulty controlling the temperature at all.
The amount of charcoal you need depends on what you’re cooking and how long you’ll be cooking. For a quick cook with thin cuts, a moderate amount is plenty. For low-and-slow cooking with larger pieces, you’ll typically use less charcoal at a lower temperature, sometimes adding fuel gradually over time rather than starting with a full load.
If you’re new to this, a good rule of thumb is to start with less than you think you need. You can always add more. You can’t take it away once the fire is going.
Opening the Lid Too Often
Every time you lift the lid, heat escapes. As the temperature drops, the cook extends, and you lose the smoke environment you’ve been building. On a gas grill, recovery is quick because the burners compensate for the loss. On charcoal, it takes time to get back to where you were.
This is a hard habit to break because there’s a natural urge to check on things, especially when you’re not sure what’s happening. But lid control is genuinely important. For anything that needs indirect cooking, try to keep the lid closed and trust the thermometer on the lid. Better yet, use an instant-read thermometer to check internal temperature only when you think you’re close to done.
Frequent lid-lifting also contributes to uneven heat on the charcoal grill, since it disrupts the heat circulation inside the cooking chamber.
Cooking on Dirty Grill Grates
Grease and food residue from previous cooks don’t just create bad flavors; they also contribute to cross-contamination. They cause flare-ups and make food stick. Yet people regularly skip cleaning the grates, or do a quick wipe that doesn’t really get the job done.
The best time to clean grill grates is while they’re still hot, either right after the last cook or right after preheating for the current one. A good grill brush does the job effectively in a minute or two once the grates are hot. The residue is soft and comes off easily. Wait until the grill is cold, or it will become much harder to remove.
If you don’t want to deal with a grill brush, another option is to ball up some aluminum foil and scrub with tongs. Not as efficient, but it works in a pinch. Either way, clean grates are worth the effort. Food releases better, flavors are cleaner, and you’re not eating last weekend’s burnt remnants.
Neglecting Ash Buildup
Ash collects at the bottom of the firebox during and after every cook. If you don’t empty it regularly, it limits the oxygen feeding the fire and gradually slows combustion. You’ll notice the charcoal burning cooler than it should, inconsistent temperatures throughout the cook, and coals that seem to die out faster than expected.
After every few uses, let the grill cool completely, then empty the ash catcher. Some grills make this easier than others, but it’s a quick task that pays off in more consistent heat and longer fuel burn time in the future.
Not Using a Thermometer
Guessing at doneness by feel or color is something that even experienced grillers get wrong regularly. The only reliable way to know when food is safe and properly cooked is with a thermometer. That applies whether you’re dealing with chicken, pork, or a thick ribeye.
A lid thermometer tells you the ambient temperature inside the grill, which matters for managing heat. An instant-read thermometer tells you the food’s internal temperature, which actually determines doneness and food safety. Both are worth having.
Relying on color alone is particularly unreliable with charcoal grilling because the smoke environment can affect how food looks before it’s actually done.
Getting More From Your Outdoor Charcoal Grill
Most charcoal grilling mistakes share a common thread. They come down to heat management. Whether it’s inconsistent results across the grate, food that finishes unevenly, or a fire that won’t hold temperature, the fix almost always traces back to one of the things covered above. Charcoal grill temperature control isn’t complicated once you understand what’s actually driving it: fuel, airflow, and heat zones working together.
Start with properly ashed coals, set up heat zones, manage your vents, and keep the grill clean. Those four habits alone will change your results more than anything else.
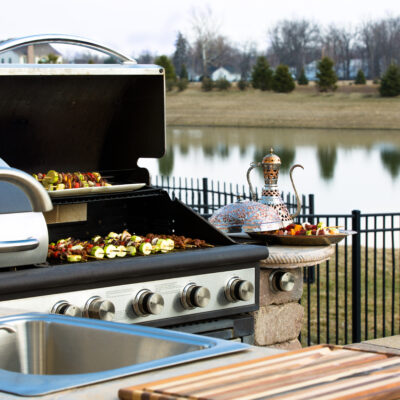
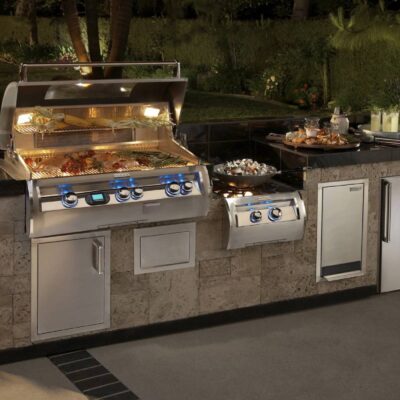
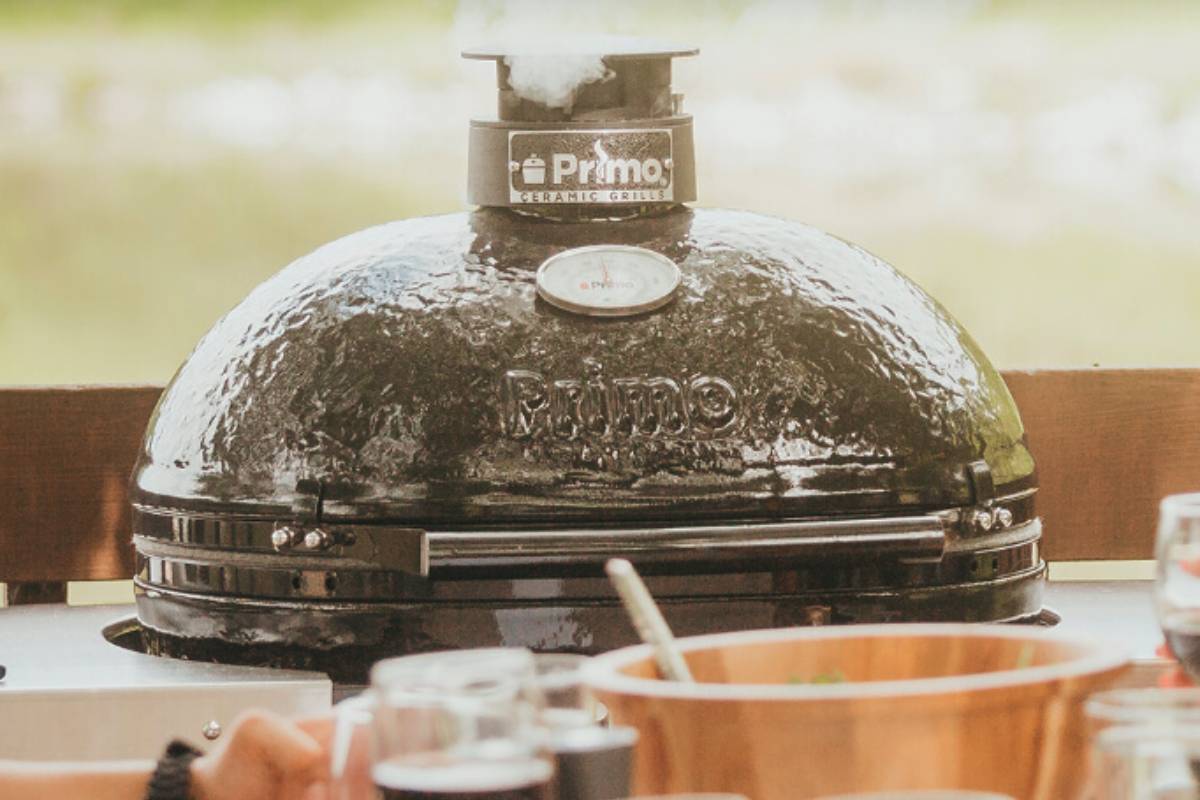
The other thing that matters, though it gets less attention, is the grill itself. A well-built outdoor charcoal grill offers better heat retention, tighter lid seals for more effective smoke circulation, and adjustable vent systems that respond to fine adjustments. A well-built grill paired with the right technique makes charcoal cooking far more consistent. A cheap, loose-fitting grill works against you from the start.
Ready to Upgrade Your Setup?
At Godby Hearth & Home, we carry a curated selection of charcoal grills built to perform, not just look good on a patio. Whether you’re a homeowner in Carmel looking for a serious kamado-style grill or someone in the Indianapolis area exploring outdoor charcoal cooking for the first time, our team is here to help you find the right fit for how you actually cook.
Stop by our Rockville Road or Carmel showrooms, or request a quote online. We’ll walk you through what’s available and help you choose a grill that matches your cooking style, your space, and your budget.
FAQs
Why do charcoal grills cook unevenly?
Hot and cold spots on a charcoal grill usually come down to one of three things: charcoal that wasn’t fully ashed over before cooking began, a single-zone fire setup without a cooler area to move food to, or vents that aren’t adjusted properly. Setting up a two-zone fire and managing airflow through the vents fixes most of this.
How long should I let charcoal burn before cooking?
After lighting, let the charcoal sit for 15 to 20 minutes to fully ash over. Once most of the coals appear gray-white on the surface with a visible orange glow underneath, they’re ready. After pouring them into the grill, preheat with the lid on for another 10 minutes before putting food on the cooking grate.
Is lump charcoal better than briquettes?
Lump charcoal burns hotter, lights faster, and leaves less ash than briquettes. It’s a good choice for high-heat searing. Charcoal briquettes burn more slowly and consistently, making them useful for longer cooks that require sustained, predictable heat. Which one you use depends on what you’re cooking.
Why does my food taste like lighter fluid?
That happens when lighter fluid hasn’t fully combusted before food goes on the grill. The fix is to switch to a chimney starter, which uses newspaper or a paraffin cube to light the charcoal without any chemical accelerants. You get cleaner-tasting food and a more reliable light every time.
How do you control temperature on a charcoal grill?
Charcoal grill temperature control comes down to airflow and fuel arrangement. Open the intake vents at the bottom and the exhaust vent at the top to raise the heat; close them partially to bring it down. Charcoal placement matters too. More fuel on one side creates a hotter direct zone, while the empty side stays cooler for indirect cooking. Combining vent adjustments with a two-zone setup gives you the most control over your cook.
How often should I clean the grill grates?
Ideally, after every cook, while the grates are still hot. A quick pass with a grill brush when everything is at temperature takes less than two minutes and prevents buildup that causes sticking and off-flavors. A deeper clean of the firebox and ash collection area should happen every few cooks, or whenever you notice reduced airflow or inconsistent heat.
Can I add more charcoal during cooking?
Yes, but add unlit charcoal to an existing fire carefully. Place it along the edges or on top of already-burning coals so it lights gradually. Adding too much at once can temporarily drop the temperature and introduce extra smoke. Using a chimney starter to pre-light additional charcoal before adding it is a cleaner approach for longer cooks.